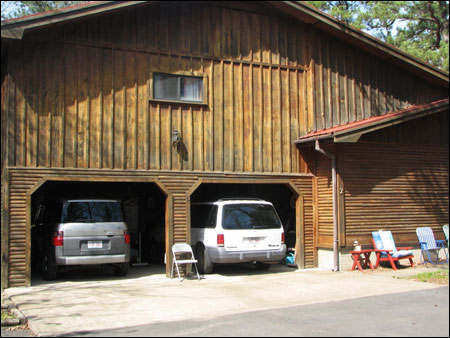
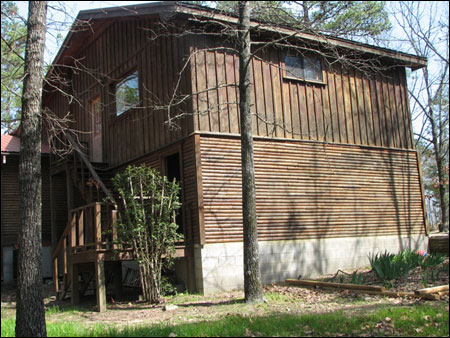
 Because we wanted a spare bedroom over the garage, creating a second story, (see photo), we felt the weight factor made it necessary to use a different, lighter material rather than the landscape timbers. Fortunately, we found some rough cut treated pine boards to use on the exterior, above the landscape timbers, and also for the gables. After the rough cut boards (1" X 10") were cut to the right length, and nailed in place, we used some 2" batten strips to cover the cracks. Both the 10" wide boards and the 2" batten strips were nailed over the insulation board, that had already been applied to the outside walls.
A couple of personal choices we made were a red metal (steel) roof and three pieces of large plate glass (44" X 76"), store-front type windows, that lets the light in and gives us a beautiful view of the outside world. One other special touch we wish we had made, but did not, was to use metal, like the old tin roof of yesteryear, on the interior ceilings, rather than sheet-rock. This metal can be attached to the rafters with screws and will be plenty strong to support the insulation in the attic.
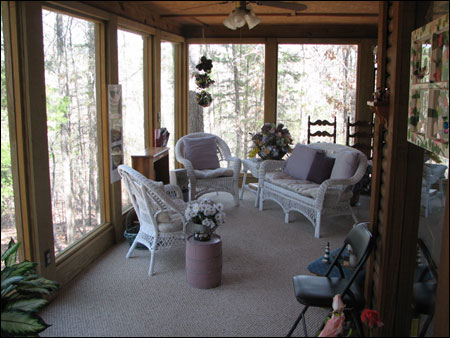
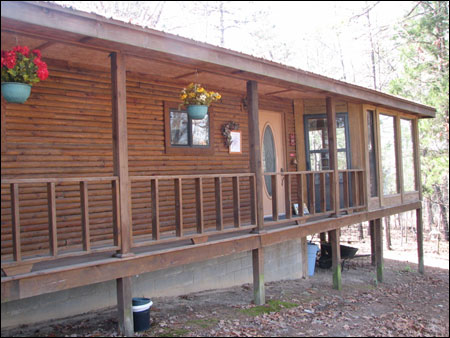 When we built the house, we included a large 8' X 34' front porch and a 4' X 32' side porch that served as a main entrance. We also had the front porch enclosed for a sun room, that included 11 pieces of that glass (44" X 76"), carpet and entrance doors at either side. We even used landscape timbers to build both the front and back entrance steps. Obviously, I could include many more details, but I would take the thrill out of the landscape timber experience for some people who are creative and want to make all those kinds of decisions for themselves. In summary, I would just like to say that once the walls are up, the roof is on and you can concentrate on the inside, go about selecting what you want to live with for many enjoyable years into the future.
However, before you get started, just a word about the exterior and interior walls. At this point it is important to share a word here which may clear up some confusion. All the timbers for the walls, both inside and outside, are just one single stack of timbers. There is no place in our house where two rows of timbers are side by side. The single walls meet to form rooms and this is where I was talking about angling the nails to tie them together. The timbers for the outside corners are cut at a 45 degree angle and pole barn nails will tie the corners together. Both steps will make the walls very, very strong. After all the walls are up, it's time to add the rafters or the trusses and you just nail these in place, across the top of the timbers. The next step is to add the plywood decking and then put on the roofing material, whatever type you choose to use.
 We waited awhile to seal the outside walls, including the rough cut pine, and the sun has turned the whole house to a golden bronze. Be sure to use clear polyurethane if you don't want to change the color. With regards to all the walls, both inside and outside, we used a commercial cleaning product called "Mr. Clean" to scrub them down and get them clean. You could use some other good household cleaner which you like. After they dried, we sprayed them with a satin finish polyurethane to preserve and protect them and make them easier to keep clean in the future. On the inside, all we do now is wipe them down about once a year to keep the dust from building We also seal the outside every three or four years to keep them from drying out.
So there you have it. Building a house from landscape timbers can be fun, rewarding and cost effective, but it is also a lot of hard work. Enjoy!
|